Saturday 23 November 2013

Christmas cake (Gluten free / Dairy Free / Nut free)


Hello Everyone


This year has gone so fast!


Only a month to go until Christmas (yippee!) so we wondered if you would like to share our Christmas cake recipe. Mum says it is much easier and cheaper than most Christmas cake recipes, but we don't know because we have never tried to make a different one. We would be interested to hear what you think.

This cake is Gluten free and dairy free for Mattie, and nut free for our mum.

Ingredients (What you need to put into the mixture)

800g of dried fruits - see note below for details
100g of glace cherries
8 tablespoons of syrup
200ml Red wine
160g Pure soya margarine (Or butter if you aren't dairy free)
3 medium eggs
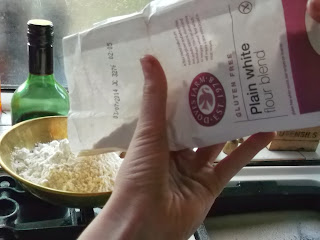
280g doves gluten free plain flour (or normal plain flour if you don't need gluten free)
Half a teaspoon of sodium bicarbonate
1 teaspoon of mixed spice
1 teaspoon of ground cinnamon

Equipment (Tools to get the job done)

A largish saucepan, weighing scales, scissors, a metal spoon, a mug, a bowl, grease proof paper, a large round cake tin and an oven

Method (How to make it)

1 Firstly weigh out the dried fruits, you can use which ever dried fruits you prefer but we used one 500g bag of Tesco dried fruit and peel and 300g sultanas. Put them into the saucepan.
If you weigh out too many (on purpose) eat a few...


2 Next comes the tricky bit, we mean sticky bit... Using scissors CAREFULLY cut the cherries into smaller pieces, they are very very sticky, look at Joel


3 Now for another sticky job, getting the syrup out of the jar. We have found a way to make it easier though. If you CAREFULLY pour some hot water into a mug and stand your spoon in it for a minute, the heat from the spoon will then stop the syrup sticking to it when you are using it to measure out the super sticky syrup


4 Add the margarine


5 Now pop the saucepan onto the cooker and heat slowly, stirring a bit now and then. Once the butter has melted, simmer for 5 minutes. (Simmering is when the liquid is just about bubbling slowly, not hot heat)

6 Next pour the mixture into a bowl, remember the pan will be HOT!! Leave the mixture to cool for half an hour or so

7 Whilst you are waiting you can put some grease proof paper into your cake tin and put the oven on.

8 When the mixture has cooled you can move on with the next bits. Start with the eggs. Crack them into a mug first, on at a time, to make sure you don't get any shell in by mistake! Pop them into your bowl with the cooled mixture


9 Weigh out the flour


10 Measure out your spices and bicarbonate


11 Sift the flour and spices on top of your eggs and fruit mix and stir really well

12 Put it into your cake tin, then pop into the oven (Gas 1)


13 Cook for about 2 hours. You will need to check from time to time whether the cake is cooked. Carefully put a skewer into to the middle. If the skewer comes out with mixture stuck to it, it needs longer to cook, if it comes out clean it is ready.

14 If the cake isn't cooked in the middle but getting too brown on the top, you could put a piece of tin foil over the top.

15 When it is done, take the cake out of the oven, but leave it in the tin for 10-15 minutes to cool a little. Then lift out, remove grease proof paper and leave to cool.

16 When cold, you can wrap it up in a clean piece of grease proof paper and store it in a tin for months!! Really you can!! Mum made one 3 years ago and left it to see what happened. Because no air has got to it and it is cooked in the sugary syrup and wine it seems to be OK... not sure we would like to try it though. We are going to leave our cake for a few weeks and then ice it ready for Christmas day.

17 We hope someone finds this recipe useful. We  hope to do a few Christmas recipes, presents for people and things like that.

Thank you for your time, enjoy your cooking.

Ethan, Reuben, Mattie, Jacob and Joel Bean

P.s Do you know any good Christmas theme jokes?


Saturday 8 June 2013

Fruit Leather (Rhubarb an apple)


Hello everybody

Sorry we haven't written anything for a while, we have lots of ideas but haven't had time to write them down.

We have been making lots of yummy things though and growing lots of plants. The snails ate nearly all of our sunflowers, but we have lots of bean plants growing taller. We even have mini cucumbers growing on our plants. Mum's allotment is a bit over grown and we are pleased (but she and dad aren't) that there are brambles and blackberry flowers in lots of places. We have three slow worms there too which is pretty cool.


One of things that has grown well in are garden in rhubarb, we have it stewed for breakfast, mum has made chutney, but we have made fruit leather. Have you ever had it? It is like yummy sweets but good for you as it only has a few ingredients and no sugar. It's a bit like fruit winders if you have had them. You basically make a fruit puree, add honey and dry the mix.


Please try this out, you'll be amazed how easy and tasty it is and can be made with blackberries or plums or anything like that.

Here is how we made ours.

Rhubarb Fruit Leather


Ingredients (What you need)

500g Rhubarb
500g Cooking apples
Juice of one good size lemon or 2 small ones
150g Honey (We just use cheap honey for this as its nearly half a jar full)


Other things you need

An oven as cool as it can be and still be turned on
2 flat baking trays
Baking paper or parchment (not he same as greaseproof which we discovered before sticks!)
A saucepan to cook the fruit in
A sieve
Wooden spoon

Method (How you make it)

For us we had to start by picking the rhubarb. It has enormous leaves! Really very huge!

Mattie said he wondered if it could be used as an umbrella


Joel offered to try it out for him


Mattie wasn't so sure


Mattie got Joel to try it out instead


1  If you are picking your own you need to chop the leaves off the top, they are great for your compost and for the worms to eat but not good for you as they are poisonous. You also need to chop the white bit off the bottom of the stalk.

You'll end up with long sticks that are good for games, until your mum catches you and asks what you are doing!


2  You need to chop it into small pieces


Mattie was told they need to be about 2cm so Jacob measures how well he is doing


3  Pop them into your pan. Next chop your apples. They need to be peeled and have the core (tough middle bit) taken out. The need to be cooking apples and not the sort you would take in your lunch box. Cooking apples go all mushy when you cook them and eating apples don't.


4  You need to get the juice out of your lemon. To get the most juice you can roll your lemon before cutting it, like this


  Then cut it in half and squeeze it into a bowl really hard. You might get some pips pop out. Fish them out with a spoon then put the lemon juice with your apples and rhubarb.

5  Put the saucepan full of fruit onto cook slowly, you will need to stir it a lot to stop it sticking. If it refuses to cook add a couple of dessert spoons of water to help, but no more than that.


6  It will slowly turn to mush, if there are bigger lumps keep cooking. You can use your wooden spoon to help break them up a bit


7  When its cooked you need to push it through a sieve as you only ant the puree bit that comes out and not the solid bits (Puree is the thick juice) This is the bit that takes the longest, it really can take AGES so get someone to help you.


8  Through away the bit left in the sieve. The lovely juice is what you want. Add your honey to it and stir.


9  You need to put the baking paper onto your trays and then divide your fruit and honey mix like this


10  Use a knife to help spread it thinly and evenly all over


11  Pop it into you oven to dry all day, really, about 8-10 hrs. It needs to completely dry out.


12 When it has it can peel off the paper like this


13 Pop it onto a new piece of baking paper, roll it up and put it into an airtight container. Cut or rip bits off as you want them. It will keep for months but ours gets eaten long before that.


14  We love making ours with blackberries in the summer too as we can pick them for free

15 You can choose different fruits to use but you must always use the cooking apple.


We hope you enjoy this recipe, please let us know how you get on! Please share our link too.


Thank you for reading, bye for now.


Ethan (12) Reuben (10) Mattie (9) Jacob (7) and Joel Bean (4)

p.s Have you ever tried raw rhubarb?


Saturday 23 February 2013

Banana Cake (Gluten & Dairy free)

Hello

It's Mattie here.  It's my 9th birthday tomorrow.

Yesterday I asked if we could make some banana cake. Mum had bought 2 bags of bananas as they were a bit squidgy so reduced in price, but needed to be used up. A lady on twitter asked if we were going to take a photo so I thought we could make it to go here on our blog. Thank you to Marie Fraser @this_isme_marie for the idea.

It's a very easy recipe, you don't need many ingredients so have a go.


Ingredients (What You Need)

5 medium bananas
8oz of Gluten Free self raising flour (We only had plain flour so used that with 2tsp Gluten free baking powder added) You could use normal flour too, the amount remains the same.
6oz Sugar
4oz Sultanas
2 eggs


Other things you'll need. A mixing bowl. A potato masher or fork. A small bowl or cup to break eggs into. A loaf shaped baking tin. Some grease proof paper. note; if you don't have a loaf tin you could make them in muffin cases, just half the cooking time, or use a normal cake tin.


Method (How to make it)

Firstly heat your oven to gas mark 4 or 180'c

Peel your bananas, and put them into your mixing bowl. But watch out for cheeky monkeys!


Uh Oh !
 
 
And if they come, make sure they don't eat too many

Caught
 

And if they do, find out where they are hiding the rest...

Found him!

When you have your bananas peeled, and in your bowl it's time to mash them. This is easiest with a potato masher, but can be done with a fork. Be careful as the bananas get slippery and then its easy to slip with the masher.


Next you need to add the sultanas, sugar and the eggs. Break the eggs carefully into a bowl first to make sure there isn't any shell in with them by mistake!


Next sift and stir in the flour, making sure it is well mixed


Right, last thing is putting it into the oven. Firstly you need to put grease proof paper into your tin. We find that if we screw the paper up into a ball first then pen it out again, it sits flatter and more easily into the tin.


Pour your mixture into your tin like this.


Put it into the oven CAREFULLY for about an hour.

When it is done it should be golden brown, probably slightly cracked on the top and if you put a small knife in it shouldn't have mixture stuck on it when you take it out.

This is what mine looked like.


A note from mum - This cake is great for lunch boxes, bananas give a good energy boost. It also freezes well, so if you are only going to use a bit at a time then you could slice it and freeze it. It keeps well too.

Thank you for reading this. If you have a go at making this banana cake then we would love to see your pictures. You can email them to us if you like and then we could put them on the blog.

Bye for now

Mattie

Ethan, Reuben. Jacob and Joel Bean too.

Friday 22 February 2013

Get Ready, Get Set, Garden

Hello Everybody


We hope you have a had a good half term? We have been very busy. We have been to our new allotment, there is a lot of work to do there


We have been out with our friends


We have baked a bit, played a lot and started sorting seeds.

This picture is of some cucumbers that we planted two weeks ago


We wondered if anyone would like to have a go at gardening with us?

We were thinking of having a best scarecrow contest over the Easter holidays, a tallest sunflower competition and also some other lets plant.... things? We can also show you how to make a wormery!!

First of all we need to start saving some junk type bits and pieces.

We have been saving some insides of toilet rolls, we are going to use them to plant peas into. When they have grown a bit we can then put the toilet rolls into the ground as they are compostable. So its time to start saving yours, and as your friends and family too as well.

You might soon have as many as Mattie.


Mattie has been using his to  play with too.


You could also ask around if anyone is throwing out old clothes so that you can have some ready to make your scarecrow.

So here is a rough list of what you will need to find over the next week or two

Pea Planting
Toilet roll insides
Compost
Pea seeds

Sunflower growing
Sunflower seeds, we are happy to share ours with anyone local to us.
Compost

Scarecrows
Old clothes, like trousers, shirt, gloves, also something you can use to make a face and head, maybe an old pillow case? We saw some cheap ones at the charity shop this week.
You will also need other bits like straw to make your scarecrow, but we will write more about that in a few weeks.

We would like to know if this post has been interesting or not so we can work harder to make it better for you to read.

Mum says sorry that the photos aren't very good but we haven't got a camera anymore, it got broken a while ago and we have been using her phone instead.

Thank you for your time

Ethan, Reuben, Mattie, Jacob and Joel Bean

Tuesday 12 February 2013

Valentines Biscuits


Hello again everybody

As it is Valentine's day tomorrow we wondered if you might like to make some valentine's biscuits?

These ones are easy to make, yummy to eat and cool to give away.

We use this recipe to make gingerbread men too.

Ingredients

6oz/175g self raising flour                              
0.5 tsp bicarbonate of soda
1 tsp cinnamon
0.5 tsp ground ginger
2 tsp sugar
2oz/50g butter
3 tbsp syrup

If you need to make a gluten free version add gluten free flour, same quantity and a tsp of xanthan gum if you have some, it's not essential but makes the biscuits less fragile.

Swap the butter for Soya margarine if you need a dairy free option too

Other things you need

2 baking trays
Biscuit cutters
Rolling pin
Small saucepan
Mixing bowl


Method (How to make them)

Pre heat oven to Gas5/190'c (Pre heat means getting it warm before you start)

Grease a couple of baking sheets by rubbing some butter over the baking sheet, this stops the biscuits sticking

Weigh out your flour and put it into your mixing bowl with the sugar, bicarbonate of soda, ginger and cinnamon. (These are called the dry ingredients)

You can use flowers?


Battle of flower v flour


In a little pan carefully and slowly melt the butter with the syrup, this will get very hot.

Pour the melted mixture from the pan into the bowl with your dry ingredients and mix well.

You should now have a 'dough', where it has all stuck together in a ball, if it is a little too soft add a small amount more flour

Roll out on a floured surface to about 4mm thick and cut with heart shaped cutters (Or whichever shape you fancy)


Pop onto the baking sheets. If they have stuck to the surface a bit try sliding a butter knife underneath them to loosen them a bit.

Cook for approx 8-10 minutes but watch them carefully as they can over cook quite quickly

Remove from oven (carefully) Then leave them on the tray for a couple of minutes before transferring to a cooling rack, if you move them too quickly they might break, and a broken heart isn't a good thing.

Ice if you like.

We hope you enjoy making these, they are hard not to eat all in one go!

Thank you for reading

Ethan, Reuben, Mattie, Jacob and Joel Bean


Here is a picture of some we have made before.